
ZOZO's Contact Solver 🫶
A contact solver for physics-based simulations involving 👚 shells, 🪵 solids, 🪢 rods, 🧱 rigid bodies and ⏳ sand. Started as an in-house physics engine at ZOZO, Inc., the largest fashion e-commerce company in Japan, and now evolving with the community. All open-source.


🤖 LLM Transparency: We highly respect that readers expect to hear the author's original voice and tone, which we work to retain throughout. Our use of LLMs is clarified in (Markdown).
📌 TL;DR
If you simply want to use this through Blender, watch this CGMatter YouTube video. The release page is here. Our video tutorials page is here.
👀 Quick Look
🎨 Simulate remotely from our Blender add-on (screenshots taken on macOS; you can also run locally on a modern NVIDIA GPU on Windows or Linux, or on an Apple silicon Mac)
blender-addon-trailer-2026.mp4
🚀 Or run it locally: ./ppf-contact-solver (macOS/Linux), double click start.bat (Windows), or a Docker command (Linux/Windows)

🌐 Click the URL and explore our examples

✨ Highlights
- 💪 100% Penetration-Free Upon Success: No snagging intersections (Details).
- 🦀 Rust-First: We minimize the use of C++ to maximize safety. No performance compromised.
- ⏲ Scalable: An extreme case includes beyond 180M contacts. Not just one million.
- 🚲 Cache Efficient: All on the GPU runs in single precision. No double precision.
- 🥼 Not Rubbery: Any single triangle never extends beyond strict upper bounds (e.g., 1%).
- 📐 Finite Element Method: We use FEM for deformables and symbolic force jacobians.
- 📊 Parameters Calibrated: Fabric presets match real measurements (Report).
- ⚔️ Highly Stressed: We run GitHub Actions to run stress tests 10 times in a row.
- 🐛 Community Tested: Users report bugs and we fix them (Issues).
- 🚀 Massively Parallel: Both contact and elasticity solvers are run on the GPU.
- 🖥️ Cross Platform: Both the add-on and the solver engine run natively on macOS, Windows, and Linux.
- 🎛️ Cross Architecture: We natively support Apple silicon (Metal), NVIDIA (CUDA), and AMD (ROCm) GPUs.
- 🧮 SIMD-Optimized CPU Backend: Our CPU code runs natively on both x86_64 and ARM64.
- 🐳 Docker Sealed: All can be deployed fast. The image is ~1GB.
- 🌐 JupyterLab Included: Open your browser and run examples right away (Video).
- 🐍 Documented Python APIs: Our Python code is fully docstringed and lintable (Video).
- ☁️ Cloud-Ready: Our solver can be seamlessly deployed on major cloud platforms.
- 🎨 Blender Add-on: Simulate remotely and fetch results locally, even on macOS.
- 🤖 MCP Support: Let a LLM run simulations for you using natural language.
- ✨ Stay Clean: You can remove all traces after use.
- 📜 Permissive License: Apache 2.0 allows commercial and proprietary use.
🚧 Gentle Disclaimer and Limitations
- ⏳ Offline use: Not real time, though some examples reach interactive rates.
- 🐢 Not the fastest: Other recent work reports faster results.
- 📉 Not differentiable: No gradients, so inverse design and learning are out of scope.
- 🧪 Not production ready (yet): Many bugs remain, including undiscovered ones. We are actively working to make it production-proof. Known bugs are tracked in Issues.
- 🐌 CPU and Metal backends are slow: Meant for evaluation, learning, and small examples. Larger scenes need a powerful GPU.
- 🟥 AMD GPUs untested: The ROCm backend has never run on real AMD hardware. We rely on community bug reports.
- 🛠️ Add-on setup takes effort: Not one click. The solver backend is deployed separately, locally or remotely.
- 👤 Development pace: Maintained by Ryoichi Ando alone, with limited time.
🔖 Table of Contents
- 📝 Change History
- 🎓 Technical Materials
- ⚡️ Requirements
- 💨 Getting Started
- 🐍 How To Use
- 🔍 Obtaining Logs
- 🖼️ Catalogue
- 🚀 GitHub Actions
- 📡 Deploying on Cloud Services
- 🤝 Community Response
- 💼 Commercial Use and Beyond
- 📬 Contributing
- 💬 Participating Discussions
- 📨 Reaching the Author
- 🔒 Our Penetration-free Guarantee
- ❓ Frequently Asked Questions
- 🙏 Acknowledgements
📚 Advanced Contents
- 🧑 Setting Up Your Development Environment (Markdown)
- 🐞 Bug Fixes and Updates (Markdown)
📝 Change History
- (2026.09.19) Added support for Apple (Metal) and AMD (ROCm) GPUs, and CPU support for x86_64 and aarch64 with SIMD optimization (AVX2 and NEON).
- (2026.07.09) Added a performance article benchmarking the speedup across all examples.
- (2026.06.30) Added rigidbody support based on Painless Differentiable Rotation Dynamics.
- (2026.06.30) Added sand support.
- (2026.06.30) Achieved 2x performance improvement with help of feedback from @Hurleyworks.
- (2026.04.30) Added a Blender Add-on support. See the documentation.
📚 For the complete change history, see articles/changes.md.
🎓 Technical Materials
📘 A Cubic Barrier with Elasticity-Inclusive Dynamic Stiffness
siga2024-main-mini.mp4
- 📚 Published in ACM Transactions on Graphics (TOG) Vol.43, No.6
- 🎥 Main video (Video)
- 🎥 Additional video examples (Directory)
- 🎥 Presentation videos (Short) (Long)
- 📃 Main paper (PDF) (Hindsight)
- 📊 Supplementary PDF (PDF)
- 🤖 Supplementary scripts (Directory)
- 🔍 Singular-value eigenanalysis (Markdown)
📌 Reference Implementation
The main branch is undergoing frequent updates and will deviate from the paper.
To retain consistency with the paper, we have created a new branch sigasia-2024.
- 🛠️ Only maintenance updates are planned for this branch.
- 🚫 General users should not use this branch as it is not optimized for best performance.
- 🚫 All algorithmic changes listed in this (Markdown) are excluded from this branch.
- 📦 We also provide a pre-compiled Docker image:
ghcr.io/st-tech/ppf-contact-solver-compiled-sigasia-2024:latestof this branch. - 🌐 Template Link for vast.ai
⚡️ Requirements
A GPU is recommended, but not required. The right backend is picked for you when a run starts.
| Hardware | Backend | Runs on | Good to know |
|---|---|---|---|
| 🟩 NVIDIA GPU | CUDA 12.8+ | Linux (x86_64, arm64), Windows (x86_64) | RTX 4090 / 5090 for large scenes; 3090 / 4070 / 5070 for small to medium ones |
| 🟥 AMD GPU | ROCm | Linux (x86_64), Windows (x86_64) | gfx9 through gfx12 |
| 🍎 Apple silicon | Metal | macOS | M1 / A14 generation or newer |
| 💻 Any CPU | CPU (x86_64, arm64) | macOS, Windows, Linux | SIMD-optimized using AVX2 and NEON instructions |
You will also need:
- 🐳 A Docker environment (see below), supported only on x86_64 with an NVIDIA GPU (CUDA)
- 🎨 Blender 5+ (only if you intend to use the Blender add-on)
💨 Getting Started
Whether you plan to use the Blender add-on or the JupyterLab interface, the solver engine itself must first be deployed. The steps below apply to both.
⚠️ Do not runwarmup.pylocally. If you do, you are very likely to hit failures and find it difficult to cleanup.
🤔 If you are cautious, you can review the build workflow to verify safety yourself. We try to maximize transparency; we never build locally and upload.
🍎 macOS Native
For Apple silicon Macs, a self-contained folder carrying the Metal and CPU backends. No Python, Homebrew, or Xcode installation is needed, and nothing is installed outside the folder.
- Download the latest release from GitHub Releases and unzip
- Open Terminal and change into the unzipped folder
- Run
./ppf-contact-solver
JupyterLab frontend will auto-start. You should be able to access it at http://localhost:8080.
Keep the terminal window open; Ctrl+C shuts it down.
🪟 Windows Native Executable
For Windows 10/11 users, a self-contained executable (several hundred MB) is available. No Python, Docker, or CUDA Toolkit installation is needed. All should simply work out of the box (Video). The x86_64 archive carries the CUDA, ROCm, and CPU backends, so one download serves an NVIDIA machine and an AMD one, while a Windows on ARM machine runs the CPU backend.
- Install the latest driver for your GPU: NVIDIA (Link) or AMD (Link), skipped for a CPU-only run
- Download the latest release from GitHub Releases and unzip
- Double click
start.bat
JupyterLab frontend will auto-start. You should be able to access it at http://localhost:8080.
🐧 Linux Native
A self-contained directory for x86_64 and aarch64 machines running glibc 2.28 or newer. The x86_64 archive carries the CUDA, ROCm, and CPU backends, and the aarch64 one carries CUDA and the CPU backend. No Python, CUDA Toolkit, or ROCm installation is needed.
- Install the latest driver for your GPU: NVIDIA (Link) or AMD (Link), skipped for a CPU-only run
- Download the latest release from GitHub Releases and unzip
- Run
./ppf-contact-solver
JupyterLab frontend will auto-start. You should be able to access it at http://localhost:8080.
Keep the terminal window open; Ctrl+C shuts it down.
🐳 Docker (Linux and Windows)
Install a NVIDIA driver (Link) on your host system and follow the instructions below specific to the operating system to get a Docker running:
| 🐧 Linux | 🪟 Windows |
|---|---|
Install the Docker engine from here (Link). Also, install the NVIDIA Container Toolkit (Link). Just to make sure that the Container Toolkit is loaded, run sudo service docker restart. |
Install the Docker Desktop (Link). You may need to log out or reboot after the installation. After logging back in, launch Docker Desktop to ensure that Docker is running. |
Next, run the following command to start the container. If no edits are needed, just copy and paste:
🪟 Windows (PowerShell)
$MY_WEB_PORT = 8080      # JupyterLab port on your side
$MY_BLENDER_PORT = 9090  # Solver port for the Blender add-on
$IMAGE_NAME = "ghcr.io/st-tech/ppf-contact-solver-compiled:latest"
docker run --rm -it `
  --name ppf-contact-solver `
  --gpus all `
  -p ${MY_WEB_PORT}:${MY_WEB_PORT} `
  -p ${MY_BLENDER_PORT}:${MY_BLENDER_PORT} `
  -e WEB_PORT=${MY_WEB_PORT} `
  $IMAGE_NAME # Image size ~1GB
🐧 Linux (Bash/Zsh)
MY_WEB_PORT=8080      # JupyterLab port on your side
MY_BLENDER_PORT=9090  # Solver port for the Blender add-on
IMAGE_NAME=ghcr.io/st-tech/ppf-contact-solver-compiled:latest
docker run --rm -it \
  --name ppf-contact-solver \
  --gpus all \
  -p ${MY_WEB_PORT}:${MY_WEB_PORT} \
  -p ${MY_BLENDER_PORT}:${MY_BLENDER_PORT} \
  -e WEB_PORT=${MY_WEB_PORT} \
  $IMAGE_NAME # Image size ~1GB
The image download shall be started. Our image is hosted on GitHub Container Registry (~1GB). JupyterLab will then auto-start. Eventually you should be seeing:
==== JupyterLab Launched! 🚀 ====
     http://localhost:8080
    Press Ctrl+C to shutdown
================================
Next, open your browser and navigate to http://localhost:8080. The port 8080 can change if you change the MY_WEB_PORT variable.
Keep your terminal window open.
Now you are ready to go! 🎉
🛑 Shutting Down
To shut down the container, just press Ctrl+C in the terminal.
The container will be removed and all traces will be cleaned up. 🧹
If you wish to keep the container running in the background, replace
--rmwith-d. To shutdown the container and remove it, rundocker stop ppf-contact-solver && docker rm ppf-contact-solver.
🔧 Advanced Installation
If you wish to build the docker image from scratch, please refer to the cleaner installation guide (Markdown).
🐍 How To Use
We provide two frontends: a Blender add-on and a JupyterLab interface. The Blender add-on lets you build scenes and run simulations entirely within Blender's UI, while JupyterLab lets you script everything in Python from your browser. Both communicate with the same solver engine, so pick whichever you like.
In both cases, you can interact with the simulator on your laptop while the actual simulation runs on a remote headless server over the internet. This means that you don't have to own NVIDIA hardware, but can rent it at vast.ai for less than $0.5 per hour. That said, if you do have a modern NVIDIA GPU on a local Windows or Linux machine, or an Apple silicon Mac, you can also run the solver directly on it. Actually, this (Video) was recorded on a vast.ai instance. The experience is good! 👍
🎨 Blender Add-on
Our Blender add-on aims to offer a familiar UI that best feels like everything works locally, but under the hood, it communicates with a remote server where all simulations run, and then the results are fetched back.
This provides a unique experience where users can leverage powerful remote GPUs while working seamlessly in their local Blender environment. Remarkably, our Blender add-on works even on macOS systems 😊, unlike other CUDA-based physics simulator add-ons that require local NVIDIA GPUs. More importantly, you can work on a laptop without worrying about draining the battery fast. 🔋
Follow this page How to Install to learn how to install the add-on. For a thorough walk through workflow, we refer to our documentation below:

🎬 Prefer video? CGMatter walks through the full setup in this video tutorial:
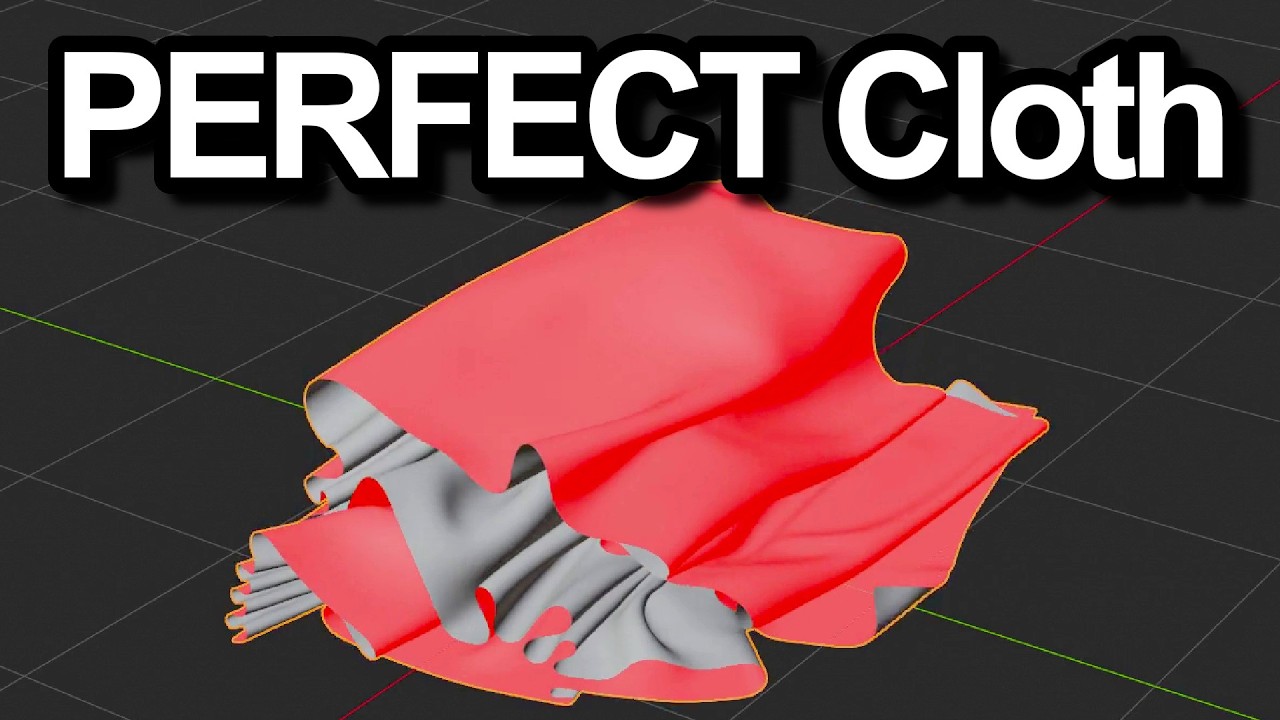
Here are some highlights:
📖 Docs Look
We maintain a full docs site with workflow guides and recorded walkthroughs for the add-on:
 |
 |
| Workflow documentation page. (Link) | Video tutorials page. (Link) |
🖼️ UI Look
Here are a couple of screenshots of the add-on running inside Blender:
 |
 |
| Kite scene set up in Blender. (full-size) | Zebra scene set up in Blender. (full-size) |

🤖 From Natural Language to Simulation (via MCP)
We expose all of the add-on's tools through an MCP server, so any LLM (Claude, Codex, etc.) can drive the whole pipeline from a natural language prompt. Scene building, parameter tweaks, and running the simulation all happen without UI clicks. Here are two examples:
 |
 |
| Codex (left) driving Blender (right) through the add-on's MCP server. | A prompt: drape a sheet over a sphere and make an animation video mp4 render 300 frames. |
🐍 From a Python Script to Simulation
You can also drive the entire pipeline from a Python script inside Blender's scripting editor. This is handy for procedural scene setup and batch variant generation. Below is a full example that drapes a sheet over a sphere:
import addon_utils
import importlib
import bpy

# Look up the add-on module under whichever extension repository Blender
# installed it into and grab the public solver API.
addon = next(m for m in addon_utils.modules() if m.__name__.endswith(".ppf_contact_solver"))
solver = importlib.import_module(f"{addon.__name__}.ops.api").solver

# Reset any prior state.
solver.clear()

# Create a sphere (the static collider) at the origin.
bpy.ops.mesh.primitive_ico_sphere_add(subdivisions=4, radius=0.5, location=(0, 0, 0))
bpy.context.object.name = "Sphere"

# Create a 2x2 sheet just above the sphere as a 64x64 grid.
bpy.ops.mesh.primitive_grid_add(x_subdivisions=64, y_subdivisions=64, size=2, location=(0, 0, 0.6))
sheet = bpy.context.object
sheet.name = "Sheet"

# Pin the two corners on the -x edge via a vertex group.
vg = sheet.vertex_groups.new(name="Corners")
corner_indices = [
    i for i, v in enumerate(sheet.data.vertices)
    if v.co.x < -0.99 and abs(abs(v.co.y) - 1.0) < 0.01
]
vg.add(corner_indices, 1.0, "REPLACE")

# Build solver groups.
cloth = solver.create_group("Cloth", type="SHELL")
cloth.add("Sheet")
cloth.param.enable_strain_limit = True
cloth.param.strain_limit_percent = 5.0
cloth.param.bend = 1

ball = solver.create_group("Ball", type="STATIC")
ball.add("Sphere")

# Pin the two sheet corners.
cloth.create_pin("Sheet", "Corners")

# Scene parameters.
solver.param.frame_count = 100
solver.param.step_size = 0.01
Here's how the script runs inside Blender (full-size):

For the full solver.* surface, see the Blender Python API guide.
🌏 Community Translations
Our add-on ships UI catalogs for 日本語, 简体中文, and 한국어, selectable from Edit → Preferences → Interface → Translation. narznarznarz polished our Korean catalog to match Blender's own Korean terminology (Discussion):
- 🇰🇷
ko_KR.jsonby narznarznarz
To install, download it (keep the name ko_KR.json) and overwrite the ko_KR.json in the installed add-on's i18n directory, which this prints in Blender's Python Console:
import addon_utils, os
addon = next(m for m in addon_utils.modules() if m.__name__.endswith(".ppf_contact_solver"))
print(os.path.join(os.path.dirname(addon.__file__), "i18n"))
Then restart Blender. Updating the add-on restores our catalog, so re-apply it after an update.
🌐 JupyterLab
Our frontend is accessible through a browser using our built-in JupyterLab interface. All is set up when you open it for the first time. Results can be interactively viewed through the browser and exported as needed. Our Python interface is designed with the following principles in mind:
- 🛠️ In-Pipeline Tri/Tet Creation: Depending on external 3D/CAD softwares for triangulation or tetrahedralization makes dynamic resolution changes cumbersome. We provide handy
.triangulate()and.tetrahedralize()calls to keep everything in-pipeline, allowing users to skip explicit mesh exports to 3D/CAD software. - 🚫 No Mesh Data Included: Preparing mesh data using external tools can be cumbersome. Our frontend minimizes this effort by allowing meshes to be created on the fly or downloaded when needed.
- 🔗 Method Chaining: We adopt the method chaining style from JavaScript, making the API intuitive to understand and read smoothly.
- 📦 Single Import for Everything: All frontend features are accessible by simply importing with
from frontend import App.
Here's an example of draping five sheets over a sphere with two corners pinned. We have more examples in the examples directory. Please take a look! 👀
# import our frontend
from frontend import App

# make an app
app = App.create("drape")

# create a square mesh resolution 128 spanning the xz plane
V, F = app.mesh.square(res=128, ex=[1, 0, 0], ey=[0, 0, 1])

# add to the asset and name it "sheet"
app.asset.add.tri("sheet", V, F)

# create an icosphere mesh radius 0.5
V, F = app.mesh.icosphere(r=0.5, subdiv_count=4)

# add to the asset and name it "sphere"
app.asset.add.tri("sphere", V, F)

# create a scene
scene = app.scene.create()

# define gap between sheets
gap = 0.01

for i in range(5):

    # add the sheet asset to the scene with an vertical offset
    obj = scene.add("sheet").at(0, gap * i, 0)

    # pick two corners
    corner = obj.grab([1, 0, -1]) + obj.grab([-1, 0, -1])

    # pin the corners
    obj.pin(corner)

    # set the strict limit on maximum strain to 5% per triangle
    obj.param.set("strain-limit", 0.05)

# add a sphere mesh at a lower position with jitter and set it static collider
scene.add("sphere").at(0, -0.5 - gap, 0).jitter().pin()

# compile the scene and report stats
scene = scene.build().report()

# preview the initial scene, shows image left
scene.preview()

# create a new session with the compiled scene
session = app.session.create(scene)

# set session params
session.param.set("frames", 100).set("dt", 0.01)

# build this session
session = session.build()

# start the simulation and live-preview the results, shows image right
session.start().preview()

# also show streaming logs
session.stream()

# or interactively view the animation sequences
session.animate()

# export all simulated frames in (sequences of ply meshes + a video)
session.export.animation()
📚 Python APIs and Parameters
-
Full API documentation is available on our GitHub Pages. The major APIs are documented using docstrings and compiled with Sphinx We have also included
jupyter-lspto provide interactive linting assistance and display docstrings as you type. See this video (Video) for an example. The behaviors can be changed through the settings. -
A list of parameters used in
param.set(key,value)is documented here: (Simulation Parameters) (Material Parameters).
⚠️ Please note that our Python APIs are subject to breaking changes as this repository undergoes frequent iterations. If you need APIs to be fixed, please fork.
🔍 Obtaining Logs
Logs for the simulation can also be queried through our Python APIs. Here's an example of how to get a list of recorded logs, fetch them, and compute the average.
# get a list of log names
logs = session.get.log.names()
print(logs)
assert "time-per-frame" in logs
assert "newton-steps" in logs

# get a list of time per video frame
msec_per_video = session.get.log.numbers("time-per-frame")

# compute the average time per video frame
print("avg per frame:", sum([n for _, n in msec_per_video]) / len(msec_per_video))

# get a list of newton steps
newton_steps = session.get.log.numbers("newton-steps")

# compute the average of consumed newton steps
print("avg newton steps:", sum([n for _, n in newton_steps]) / len(newton_steps))

# Last 8 lines. Omit for everything.
print("==== log stream ====")
for line in session.get.log.stdout(n_lines=8):
    print(line)
Below are some representatives.
vid_time refers to the video time in seconds and is recorded as float.
ms refers to the consumed simulation time in milliseconds recorded as int.
vid_frame is the video frame count recorded as int.
| Name | Description | Format |
|---|---|---|
| time-per-frame | Time per video frame | list[(vid_frame,ms)] |
| matrix-assembly | Matrix assembly time | list[(vid_time,ms)] |
| pcg-linsolve | Linear system solve time | list[(vid_time,ms)] |
| line-search | Line search time | list[(vid_time,ms)] |
| time-per-step | Time per step | list[(vid_time,ms)] |
| newton-steps | Newton iterations per step | list[(vid_time,count)] |
| num-contact | Contact count | list[(vid_time,count)] |
| max-sigma | Max stretch | list(vid_time,float) |
The full list of log names and their descriptions is documented here: (GitHub Pages).
Note that some entries have multiple records at the same video time. This occurs because the same operation is executed multiple times within a single step during the inner Newton's iterations. For example, the linear system solve is performed at each Newton's step, so if multiple Newton's steps are executed, multiple linear system solve times appear in the record at the same video time.
If you would like to retrieve the raw log stream, you can do so by
# Last 8 lines. Omit for everything.
for line in session.get.log.stdout(n_lines=8):
    print(line)
This will output something like:
* dt: 1.000e-03
* max_sigma: 1.045e+00
* avg_sigma: 1.030e+00
------ newton step 1 ------
   ====== contact_matrix_assembly ======
   > dry_pass...0 msec
   > rebuild...7 msec
   > fillin_pass...0 msec
If you would like to read stderr, you can do so using session.get.log.stderr() (if it exists).
This returns list[str].
All the log files are updated in real-time and can be fetched right after the simulation starts; you don't have to wait until it finishes.
🖼️ Catalogue
🎨 Blender Add-on Examples
These scenes are all built with our add-on. The simulation itself runs on a remote solver, or directly on your local machine if you have a modern NVIDIA GPU on Windows or Linux, or an Apple silicon Mac.
You set the geometry, constraints, and parameters from Blender's UI, and the saved .blend carries everything the add-on needs.
| kite.blend (Video) | crumple.blend (Video) | puff.blend (Video) |
 |
 |
 |
| press.blend (Video) | zebra.blend (Video) | curtain.blend (Video) |
 |
 |
 |
The simulated portion (objects, groups, pins, and solver parameters) is generated by a script you drop into Blender's Scripting editor. Cameras, lighting, and any non-simulated props are still set up in Blender's UI. Each script is linked above its thumbnail.
| cards.py (Video) | five-twist.py (Video) | noodle.py (Video) | woven.py (Video) |
 |
 |
 |
 |
🌐 JupyterLab Examples
All these examples run on our Python frontend through JupyterLab. Click any notebook to see how the scene is built, or click the video link to watch the result.


